I enjoy tying my own flies. That doesn’t mean I’m particularly good at it.
I’ve reached a certain level of acceptable competency with my tying, however — I have a few patterns down pat, and can tie them fairly well and fairly quickly (the latter is important, because I often find myself tying right up to the 11th hour before a fishing trip). That said, anything that can make my tying more efficient is something I’m interested in.
And, for me at least, that usually has to do with simple organization. A spotless tying desk becomes a cluttered mess in mere minutes when I start tying. One minute, I’m tying in bucktail for a Clouser, and the next, I’m trying to remember where I put the scissors, or digging under hackle capes to find the whip finisher. It can be a little maddening, but the mess is but a symptom of my creative mind at work. I tie flies like Nuke Laloosh pitches (among other things). I’m “kind of all over the place.”
Enter the Lone Bison Heritage fly-tying table — my latest attempt at reining in my fur-and-feather disaster. Yes, I’ve used tying tables in the past, with mixed results. But this particular custom table might just be what I need to restore some sanity to my fly-tying sessions, while also helping me keep track of the tools that I’m constantly picking up and putting down. So far — and it’s been a few months — the results are encouraging.
It helps, too, that the table is a handsome addition to my little home office — just putting it atop my desk has likely encouraged me to spend more time at the vise. As I said, I enjoy tying, but I’m also a classic fly-tying procrastinator, often waiting until a day or two before a trip to really dig in. Now, with the Lone Bison tying table on my desk and somewhat organized with essential tools, threads and hooks, I find it a bit easier to commit to a tying session than without it.
But, I’m still experimenting with it, trying to determine how to best use its features to accomplish that elusive efficiency goal.
What works
The Lone Bison Heritage tying table is a thing of beauty. From a purely aesthetic perspective, it really does add some class to my tying desk. Its rich wood is stunning, and the handsome, leather disk embossed with the Lone Bison logo is a beautiful addition. Its ample tool storage helps me keep a neater tying space than I normally would (efficiency, remember?). I also like the way Cris Jackson, the craftsman behind Lone Bison, uses magnetic connections creatively. This allows the tier to remove some features of the table that might get in the way of larger tying projects, or to position certain features of the table to better serve the project.
The tool storage bar situated at the rear of the table — but always within the line of sight for the tier — is very handy, and I think it encourages me to replace tools in the bar, which means I don’t have to go digging under a pile of tying materials to find something simple, like a pair of hackle pliers or a hair stacker. The tool bar located in the front of the table is removable, but when it’s in place, it’s sturdy, thanks to a magnetic connection between the toolbar and the table’s base.
The feature I appreciate most is the vise clamp that’s easy to tighten and loosen, allowing me to raise or lower my vise depending on the pattern I’m tying. It helps make tying a bit more ergonomic, which allows me to sit longer and be more comfortable at the vise. That means I’m likely tying more flies per session.

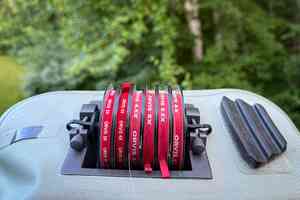
I also like the inclusion of three screw-top “bottles” and their corresponding compartments on the table. I’ve taken to using these to store hooks and beads in two of them, and then finished flies in the third. These little holders are a nice feature that tiers can essentially use as they please.
One feature I had to kind of puzzle out was Jackson’s use of little magnetic recesses in the table. I tried moving the front tool bar around, using these magnets, but realized, instead, that they were put in place to keep hooks secure and to make sure finished flies don’t slide off the table and disappear forever (who hasn’t found a fly or two in the dustpan at some point or another?).
What doesn’t
It’s a sizeable addition to any fly-tying area — if you’re not prepared to have the table become the focal point of your tying space, you probably won’t appreciate the table’s overarching functions, which, for me anyway, include better organization, ease of access to tools and, again, the efficiency factor I keep coming back to. The table is substantial — it’s not something you just slide out of the way if you want to do something else with the space.
And this is petty, but I’m still trying to figure out what to do with the two-dozen storage holes in the back toolbar — I’ve filled about two-thirds of them with tying tools, but the table looks a bit incomplete without the holes being used. As I said, I’m still experimenting with how to make the table work for me, and the more I tie, the more functional it gets.
Final word
The Lone Bison tying table is a work of art. Is it functional art? So far, I’d say it is, and it gets more useful and functional the more I tie with it. It’s not a cheap tying table — it’s real craftsmanship, and it’s priced accordingly. Consider it an investment in your overall fly-fishing game, with an emphasis on your tying productivity.
If you’re like me, you’ll find it a bit easier to spend time at the vise, especially if you can figure out how to store your tools for ease of access and ease of use. The Lone Bison table can help you do that.












Comments
Anonymous replied on Permalink
I became efficient tying by picking 1 fly per session. Tie 10 or so of the same fly at a time. You need your tying materials more organized than your bench. You only use a few tools per fly and a few materials per fly. Tying this way you put the materials away when done with that session and your bench stays clear of clutter. Try it, you master techniques easier because you tie it multiple times and you become more efficient. This has worked for me for 40 plus years of tying.
Pages