One quick glance at the high peaks of the Caribous is all any backcountry trout angler in my neck of the woods needs to come to the realization that it’s going to be a while.
Snow cornices still grace the tops of Red Ridge, and Fall Creek is running dirty. Getting up high to the cutthroat water is weeks away. And I’m sure I’m not alone as I struggle with my impatience. Backcountry trout anglers all over the West are fighting itchy trigger fingers, just like they do almost every year at this time. Winter hangs on in the Rockies. It’s a fact of life, and all we can do is wait.
But for lower-elevation trout water here in the West, the “season” is underway. In the Midwest and along the Eastern Seaboard, trout season is already full go. And if you’re like me, you might be a bit behind when it comes to getting gear ready for fishing season (although, for me at least, I still have some time, given that, while tailwaters are fishing well, runoff is just getting started up high here in the Rockies).
If you’re behind the 8-ball on preparation, now’s the time to take inventory of needed flies and stock up on any needed items, or make any repairs to rods, reels, waders and such.
Over the years, I’ve developed a pretty simple checklist that helps me prepare for trout fishing here in the Yellowstone region, but my list might be a bit unusual, given that I tend to combine my fishing list with my camping list — my conduit to backcountry trips usually involves using my camp trailer as a “home base” for off-the-beaten-path trips, and a lot of the gear and equipment lives in the camper all summer long. In a few weeks, I’ll drive right by the big water and drift boat hatches and start chasing high-country trout.
That said, fly-fishing gear for trout is generally universal, with the obvious caveats that rod weights may vary as will tippet sizes and flies. Here are the basics.
-
Rods
It’s probably been months since you’ve pulled your favorite fly rod out of the closet. If you’re like me, and you’re into “gear overkill,” you might have a couple of rods (maybe even three, if you’re a drift-boat angler and like to have set-ups for dry flies, nymphs and streamers) that you take with you on every trip. Take the rod out of the tube and sock, and make sure it’s sound — ensure the feet of the snake guides are still firmly attached to the rod and that the thread wraps aren’t failing or the finish isn’t crazing. Double-check the security of the cork grip and look for cracks or splits at the ferrules. Wipe the rods down with a moist towel and make sure they’re good and dry before you put them back in the sock and tube.
-
Reels
Same deal. It’s been a while since these things have seen use. Take the reels apart and make sure the “guts” of the implement are clean. I like to take some warm water with a bit of dish soap mixed in and go over the innards of the reel with a toothbrush. When you’re done cleaning, make sure it’s good and dry, and apply some thin oil (like sewing machine oil, for instance) to the moving parts. Most fly reels for trout amount to line holders — I’ve never seen my backing while fighting a cutthroat, but that doesn’t mean I don’t take care of the gear. You’ll still want to get bigger fish on the reel, and you’ll still be stripping line off the reel for casting. It may seem like overkill to focus so much time on the reel, but doing so will help them last years longer.
-
Fly line
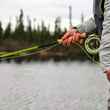
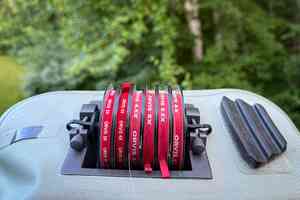
Fly lines can last for years if you take care of them, and it’s not an onerous process. It’s particularly important for light-weight fly lines used for smaller rods in backcountry situations, as it’s usually thinner, lighter and, given the terrain you’ll be fishing, more prone to getting snagged on rocks and branches. For starters, strip the line off the reel and dunk it in warm water mixed with some mild dish soap. Agitate and then dry it with a dish rag or even a paper towel. Then apply a fly-line dressing, like Scientific Anglers' Fly Line Cleaner or even just a line-cleaning “towelette” that multiple line manufacturers include with the line. The best way to do this is to hold the reel in your right hand and pinch the line between the towelette with your right thumb and forefinger while you reel the line in with your left hand. This will keep the nylon from cracking and splitting, and add seasons to your fly line.
-
Flies
First, do you have enough, and, second, do you have enough of the patterns you’re likely to use more than others? Since I tend to fish more in the backcountry, I like to tie attractors, like Adams, Stimulators, Wulffs, grasshoppers, Prince Nymphs, San Juan Worms and the like. Big-water fly fishers might be more prone to articulated streamers, big stonefly nymphs and high-floating Chernobyls that can do double duty as an indicator. It’s not too late to hit the vise and crank out a couple dozen before high season is underway in earnest. I make it easy — I pack a travel vise and basic fly-tying material in my camper. If I run low, or find that the fish are on a particular bug, I can tie flies during the evening (usually over a tumbler of good Irish whiskey. Go through your fly boxes and remove any flies with rusty hooks, splayed hackle or thread that’s about to unwind. I like to “start over” at the beginning of summer with a freshly stocked fly box, knowing full well that by September, the box is going to look like something the cat coughed up. If you fish a lot of dry flies, now is the time to do any pre-treatments with fly floatant. Letting the flies “marinate” for a few days is preferable. For a few weeks? Ideal. And, it saves you time on the water later.
-
Waders
I usually only don waders early in the summer fishing season. I prefer to wet-wade most high-country trout streams, but in June, that water is downright frigid (as are early season tailwaters). So check for leaks. Here’s how: Turn your waders inside out and get your hands on some rubbing alcohol. Put it in a spray bottle and spray the waders, a section at time with. Dark spots that show up after you spray the material indicate small holes (you might be surprised at how many little pinhole leaks there are). Get a popsicle stick or a tongue depressor, along with some Aquaseal. Apply a pea-sized dollop of Aquaseal atop each little leak, and spread it out evenly with your depressor. Hang your waders and let the patches dry. Then you’re all set.
-
Wading boots
If your boots are leather or have leather components, and they've been sitting in a closet all winter, you’re likely going to need some leather conditioner (I get mine at Boot Barn, but it’s also available online). Apply the conditioner liberally and work the boots until they’re flexible again. To avoid having to spend too much time doing this next season, do this step in the fall, too. Check your soles — are they separating? If they have felt, is the felt lifting from the sole (if so, Shoe Goo is a magical thing)? If they’re studded, are you missing studs (quarter-inch sheet-metal screws are excellent replacements, and they’re cheap)? Check the laces. If they’re frayed, replace them before you hit the water.
-
Vests and/or packs
Thanks to a sketchy back, I’ve reverted from using my trusty sling pack to a good, old-fashioned fishing vest. But the process is the same. Do you have a few packs of tapered leaders (or the material you’ll need to craft a leader)? Several spools of tippet, ranging from 3x to 6x (you likely won’t need anything lighter than that unless you’re fishing over picky fish in a spring creek)? Are your nippers rust-free and sharp? Hemos or mitten clamps still work? Do the zingers still … zing? Indicators? Lead-free split-shot? A small pocket knife? Make sure you’re stocked and ready to go, and don’t forget the stuff that’s really important — the summer sun can be vicious when you fish, because you get the rays from the sky, and the reflection from the water, so a small tube of sunscreen is necessary. It’s also not a bad idea to include some sort of insect repellant, even if it’s just the little wet-wipe pads. Early in the season, when the mosquitos are particularly bad thanks to all the standing water, I’ve taken to carrying a Thermacell on a belt clip. This little butane-powered concoction is a godsend. And, of course, make room in your vest or pack for at least one or two face/neck gaiters. Chances are, in the backcountry, you’re not going to encounter too many other anglers, so the real purpose of these garments is for sun protection. But, if you’re fishing with a buddy during the viral pandemic, it’s never a bad idea to add a layer of protection between you and your fellow angler.
-
Refresh (or build) your Go Bag
Pull out your fly fishing go-bag from last season. Make sure that everything in the bag is fresh and functioning. There's no point in having a go-bag if the stuff inside it is broken, dried out or otherwise no good.
Don't have a go-bag? Well, now's a great time to build one. Go-bags are cheap and easy to throw together and will eventually save a fishing trip (or several).
For those of us in the West, now’s the time to get ready for the summer season (and if you’re in the East, time is short!). If you’re like me, and this is your favorite time of the year for fly fishing, there’s no reason not to prepare for it.
Getting ready might seem like a significant ordeal, and, honestly, it can be. But if you know what kind of fishing you have ahead of you, you can start tackling the tasks, one a time, so when you hit the water, you’ll be the one fishing instead of dealing with gear issues.












Comments
doug balfour replied on Permalink
Great thoughts, Chris.
Pages